Created: 2026-03-01Updated: 2026-03-01
ComfyUI on M2: Local Image API with Character Consistency
I'm building a tabletop RPG game that generates images on the fly: character portraits, enemy illustrations, scene art. Cloud APIs work but get expensive when every combat encounter wants several images. More importantly, I need character consistency. If I generate a portrait of "Aria the rogue" in session one, future images of her should look like the same character, not a random new person.
ComfyUI solves both. It runs locally on Apple Silicon, exposes a REST API, and supports IP-Adapter for using an existing portrait as a visual reference for new generations.
Hardware Reality
MacBook Air M2, 16GB unified memory. The Air throttles under sustained load since it has no active cooling. Fine for a game that generates at natural breaks (between scenes, at combat start) rather than continuously. If you're curious how LLMs perform on this same hardware, I ran a local LLM bakeoff on the M2 Air that compares Qwen3, DeepSeek, and Mistral at 16GB.
16GB comfortably fits:
- SDXL (fp16, ~6.5GB): mature IP-Adapter ecosystem, good portrait quality
- FLUX.2-klein-4B (fp8, ~8-9GB): Apache 2.0, released November 2025, 4-step distilled generation, supersedes FLUX.1-schnell. IP-Adapter support less mature than SDXL.
- FLUX.1-dev (fp8, ~8GB): previous generation but still the best quality option that fits 16GB. FLUX.2-dev exists but won't fit.
For this post I'm using SDXL. Its IP-Adapter tools are battle-tested for exactly this use case, and 6.5GB leaves plenty of headroom for additional models.
Install ComfyUI
ComfyUI has a Desktop app that handles everything automatically. Use that if you just want the UI. For API access and full control, manual install is cleaner.
git clone https://github.com/comfyanonymous/ComfyUI
cd ComfyUI
python3.13 -m venv venv
source venv/bin/activate
python --version  # must say 3.13 — if it says 3.9 you have an old venv, rm -rf venv and redo
pip install -r requirements.txt
On Apple Silicon, the requirements file pulls a PyTorch build with MPS support automatically. No CUDA, no special flags.
Start it:
source venv/bin/activate
python main.py --listen 0.0.0.0 --port 8188
--listen 0.0.0.0 binds to all interfaces instead of localhost only. Needed for
the API to be reachable from other processes or devices on your network.
I keep a start-comfyui.sh in ~/models/ next to the model README so there's
one place for everything model-related:
#!/bin/bash
source /path/to/ComfyUI/venv/bin/activate
cd /path/to/ComfyUI
python main.py --listen 0.0.0.0 --port 8188
Open http://localhost:8188. You should see the node graph UI with a default
workflow loaded. No models needed for the server to start — the UI comes up
regardless.
Model Storage
Models don't need to live inside the repo. ComfyUI will look in additional
directories if you tell it to via extra_model_paths.yaml:
cp extra_model_paths.yaml.example extra_model_paths.yaml
Then add an entry pointing at wherever you keep models. For example, if you
store them under ~/models/:
my_models:
  base_path: ~/models/
  checkpoints: sdxl/
  ipadapter: ipadapter/
  clip_vision: clip_vision/
Adjust the subdirectory names to match your layout. ComfyUI merges these with its own paths and shows everything in the UI dropdowns.
Models
Download SDXL (~6.5GB):
hf download stabilityai/stable-diffusion-xl-base-1.0 \
  sd_xl_base_1.0.safetensors \
  --local-dir ~/models/sdxl/
For IP-Adapter, clone the custom node into ComfyUI's custom_nodes/ directory:
cd /path/to/ComfyUI/custom_nodes
git clone https://github.com/cubiq/ComfyUI_IPAdapter_plus
No pip install needed — it has no extra dependencies beyond what ComfyUI already installs. ComfyUI picks it up automatically on next startup.
Then download the IP-Adapter weights:
# IP-Adapter for SDXL
hf download h94/IP-Adapter \
  sdxl_models/ip-adapter_sdxl.bin \
  --local-dir ~/models/ipadapter/

# CLIP vision encoder (required by IP-Adapter — must be ViT-bigG, not ViT-L)
hf download laion/CLIP-ViT-bigG-14-laion2B-39B-b160k \
  --local-dir ~/models/clip_vision/CLIP-ViT-bigG-14-laion2B-39B-b160k/
Restart ComfyUI after installing custom nodes. It rescans the nodes directory on startup.
Quick Test
Before touching the API, confirm generation works at all.
The built-in Templates target newer models and won't work with SDXL. ComfyUI ships a test workflow in the repo — open it with File > Open:
/path/to/ComfyUI/tests/inference/graphs/default_graph_sdxl1_0.json

It's a base+refiner workflow with two Load Checkpoint nodes. The top one
should already show sd_xl_base_1.0.safetensors. The bottom one defaults to
sd_xl_refiner_1.0.safetensors — change it to sd_xl_base_1.0.safetensors
too. We're not doing base+refiner, just running base twice.
Drop a prompt into one of the CLIP Text Encode nodes and hit Run:
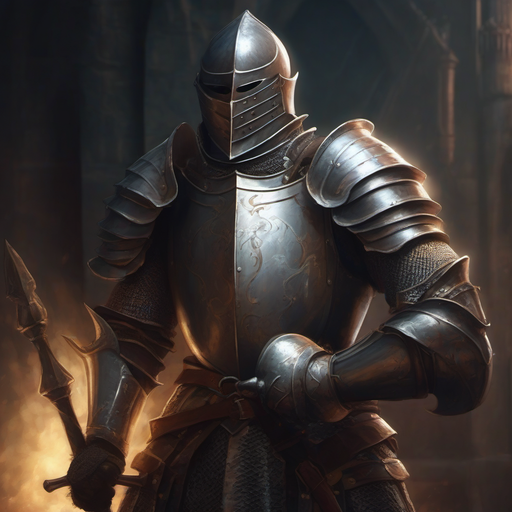
a knight in plate armor holding a mace and shield, fantasy RPG portrait,
detailed face, dramatic lighting, painterly style, 4k, highly detailed
First run is slow while the model loads. On M2 Air, SDXL at 20 steps takes 90-120 seconds. Subsequent runs with the model cached are faster but still in that range — the Air throttles under sustained load with no active cooling.
Img2Img: Post-Battle
Txt2img generates from noise. Img2img starts from an existing image and nudges it toward a new prompt. Good way to stay close to a character while changing context or condition.
Add two nodes to the current workflow. Right-click empty canvas space (not on a node) to get the picker:
- image → Load Image — then select your knight from
ComfyUI/output/using the dropdown in the node, or upload it from there - latent → VAE Encode — converts a pixel image into the latent space the sampler works in, replacing the EmptyLatentImage
Then make three connections. To draw a wire: click and drag from an output dot (right side of a node) to an input dot (left side of another node). The dots are color-coded by type and will only connect to compatible ports.
- Drag from the IMAGE dot (blue, right side of Load Image) to the pixels dot on VAE Encode
- Drag from either Load Checkpoint VAE dot → VAE Encode vae dot
- Drag from VAE Encode LATENT dot → KSampler latent_image dot (disconnects EmptyLatentImage automatically)
The test workflow uses KSampler Advanced, which has no denoise slider.
Instead set start_at_step to 6. With 20 total steps that runs the last
14, equivalent to about 70% denoise. Lower start_at_step = more faithful to
original, higher = more change.
Update the positive prompt — that's the CLIP Text Encode node wired to the KSampler's positive input, as opposed to the negative one (which holds your "ugly, blurry..." text):
a knight in plate armor, damaged armor, battle-worn, dented helmet,
scratches and dents, mud-stained, exhausted, fantasy RPG portrait,
detailed face, dramatic lighting, painterly style, 4k, highly detailed
Hit Run. If it's changing too much, drop start_at_step to 4. If the damage isn't reading, push to 8.
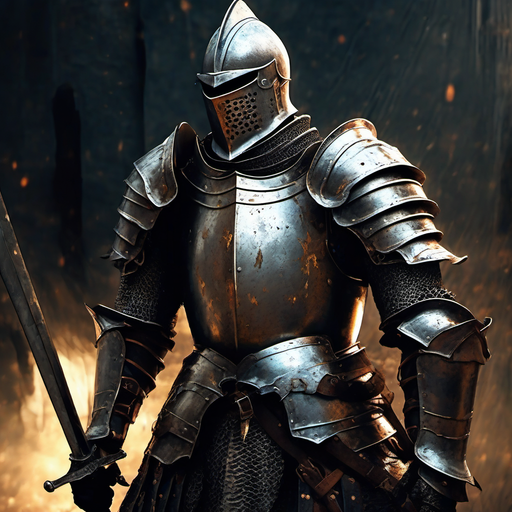
Img2img works, but it's coarse. Fine details like face structure get lost as you increase denoise, and at low denoise the prompt has limited influence. Good for "same scene, different state." Not what you want for generating the same character across completely different scenes.
That's what IP-Adapter is for. Instead of perturbing the reference image, it encodes it through CLIP vision into an embedding that gets injected alongside the text conditioning during generation. The sampler still starts from pure noise, but the attention layers are nudged toward the character's appearance at every step. Face and body survive across very different scenes because the conditioning runs throughout, not just at the start.
The API
ComfyUI's API accepts a workflow as JSON and queues the generation. The workflow you build in the UI can be exported in API format: go to Settings, enable Dev Mode Options, then use the "Save (API Format)" button on the workflow.
The API format represents each node as a dict entry keyed by node ID. Here's a minimal SDXL workflow:
{
  "4": {
    "class_type": "CheckpointLoaderSimple",
    "inputs": { "ckpt_name": "sd_xl_base_1.0.safetensors" }
  },
  "5": {
    "class_type": "EmptyLatentImage",
    "inputs": { "batch_size": 1, "height": 1024, "width": 768 }
  },
  "6": {
    "class_type": "CLIPTextEncode",
    "inputs": {
      "clip": ["4", 1],
      "text": "a fantasy rogue in a dark alley, RPG portrait, detailed"
    }
  },
  "7": {
    "class_type": "CLIPTextEncode",
    "inputs": {
      "clip": ["4", 1],
      "text": "ugly, blurry, watermark, text, bad anatomy"
    }
  },
  "3": {
    "class_type": "KSampler",
    "inputs": {
      "model": ["4", 0],
      "positive": ["6", 0],
      "negative": ["7", 0],
      "latent_image": ["5", 0],
      "seed": 42,
      "steps": 20,
      "cfg": 7,
      "sampler_name": "dpmpp_2m",
      "scheduler": "karras",
      "denoise": 1
    }
  },
  "8": {
    "class_type": "VAEDecode",
    "inputs": { "samples": ["3", 0], "vae": ["4", 2] }
  },
  "9": {
    "class_type": "SaveImage",
    "inputs": { "filename_prefix": "rpg", "images": ["8", 0] }
  }
}
Submit it:
curl -X POST http://localhost:8188/prompt \
  -H "Content-Type: application/json" \
  -d '{"prompt": <workflow_json>}'
# Returns: {"prompt_id": "abc123...", "number": 1, "node_errors": {}}
Poll for completion:
curl http://localhost:8188/history/abc123
# When done: history[prompt_id]["status"]["completed"] == true
Fetch the image:
curl "http://localhost:8188/view?filename=rpg_00001_.png" \
  --output character.png
Images also land in ComfyUI/output/ on disk if you'd rather read them
directly.
Image Consistency with IP-Adapter
IP-Adapter encodes a reference image using CLIP vision and injects that embedding alongside the text prompt during generation. The result is a new image that respects the prompt but is visually pulled toward the reference: same hair, same armor, similar face structure.
It's not a perfect clone. Think of it as a strong nudge. Consistent text prompts help too. If every prompt for Aria includes "tall elf rogue, purple hair, leather armor," you're conditioning from both directions.
Add these nodes to the workflow above:
"10": {
  "class_type": "IPAdapterModelLoader",
  "inputs": { "ipadapter_file": "ip-adapter_sdxl.bin" }
},
"11": {
  "class_type": "CLIPVisionLoader",
  "inputs": { "clip_name": "CLIP-ViT-bigG-14-laion2B-39B-b160k/open_clip_model.safetensors" }
},
"12": {
  "class_type": "LoadImage",
  "inputs": { "image": "aria_portrait.png" }
},
"13": {
  "class_type": "IPAdapterAdvanced",
  "inputs": {
    "model": ["4", 0],
    "ipadapter": ["10", 0],
    "image": ["12", 0],
    "clip_vision": ["11", 0],
    "weight": 0.6,
    "weight_type": "linear",
    "combine_embeds": "concat",
    "start_at": 0.0,
    "end_at": 1.0,
    "embeds_scaling": "V only"
  }
}
Then change node "3"'s model input from ["4", 0] to ["13", 0].
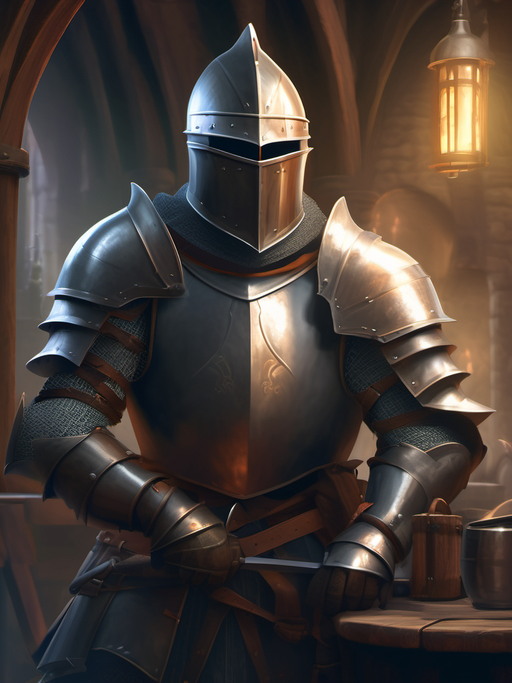
The prompt here asks for the same knight in a tavern — completely different scene, same character used as reference.
weight is the main knob. At 0.5 you get style and general appearance influence.
At 0.8 it starts fighting the text prompt. For character identity, 0.6-0.7 is
the range to start with.
The image input in node "12" is a filename relative to ComfyUI/input/.
Copy your reference images there, or upload them via the API:
curl -X POST http://localhost:8188/upload/image \
  -F "image=@aria_portrait.png"
# Returns: {"name": "aria_portrait.png", "subfolder": "", "type": "input"}
Face Consistency
Standard IP-Adapter works well for overall style and body type. Faces drift more than you'd like, especially across very different scenes. IP-Adapter FaceID handles this by extracting face embeddings specifically rather than encoding the whole image.
Download:
hf download h94/IP-Adapter-FaceID \
  ip-adapter-faceid-plusv2_sdxl.bin \
  --local-dir ~/models/ipadapter/
FaceID also requires InsightFace, which isn't on HuggingFace. Download the
antelopev2 model package from the
InsightFace model zoo
and place it under ~/models/insightface/models/antelopev2/ (or wherever your
extra_model_paths.yaml maps insightface).
Install the Python package into the ComfyUI venv:
source /path/to/ComfyUI/venv/bin/activate
pip install insightface onnxruntime
With FaceID installed, use IPAdapterFaceIDAdvanced instead of IPAdapterAdvanced.
It takes the same inputs but runs the face embedding extraction automatically.
Faces stay recognizable across very different scenes much more reliably than with
the standard adapter.
You can combine both: use IPAdapterAdvanced for overall character appearance
and IPAdapterFaceIDAdvanced for face locking, chaining them in sequence.
Game Integration
The pattern for a TTRPG character system:
graph TD
    A[Player describes character] --> B[Generate initial portrait\nno reference image]
    B --> C[Store portrait in character record]
    C --> D[Game event triggers image]
    D --> E[Build scene + character prompt]
    E --> F[Upload portrait, generate\nwith IP-Adapter]
    F --> G[Display in game]
    G --> D